We used many different technologies and software in the making of our teaser trailer and ancillary texts, while making the products I learnt new techniques and ways of creating them. To film the teaser trailer we used a standard video camera, an adjustable tripod and a sound boom.





Equipment for filming:
Camera: We used a standard video camera to film our project, we were given a tape and could use the camera as many times as we wanted to film our footage, as there are quite alot of students doing media students some times when we wished to use them they would already be taken and used for the other groups. From using the camera I have learnt that sometimes the footage you film wont turn out the way you expected it, maybe due to lighting in the room or where you are filming it, for example some of our scenes were filmed outside at night so we used a cars headlights to create light so we could see in front of us. I have also learnt how still we need to hold the camera when filming longer shots, we found that quite alot of our shots were abit shaky where we didnt have a steady hand, the slightest movement shows up much more when on the computer screen and not on the video camera. Another thing I learnt was that the zoom on the camera sometimes goes out of focus so we tried avoiding the zoom completely. I found that the cameras we used are good for what we wanted to film.

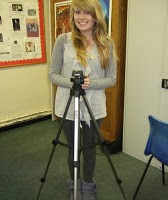
Tripod: We used the tripod to help aid us in filming our teaser trailer, we mainly used the tripod to hold a shot steady. The tripod we used can extend and be made smaller so you can use it at a height that you need, where the camera attaches to the tripod you can also move it up and down and left and right and adjust how loose you want it to move, this helps create a smooth panning shot. From using the tripod I have learnt how to create different shots from different heights but the camera being still. I have also learnt that we should check all the equipment before we take it to use it for filming because the tripods have clips that can be removed these are what attach the camera to the tripod and some of the clips were not on the tripods when we took it home so we struggled to use the tripod when this happened.

Sound Boom: The sound boom is used to improve the sound while filming, in filming our teaser we found that we didnt need to use the sound boom as much because we had minimal sound from the footage we filmed, from using the sound boom we learnt that you have to remember to turn the sound boom on when you start filming or you will have no sound at all. Sometimes we only found out that we had no sound for our footage when we got back to school so we had to film the same footage again another time. We also learnt that the sound boom doesnt stretch very far so we would have to film the sound quite close to the camera. Another thing we learnt was that if you are too close to the sound boom and are quite loud the sound can crackle abit.
Editing equipment and research:
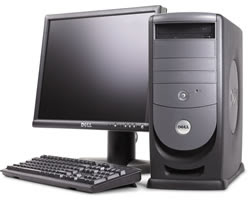
Computer: We found that the computer we used for editing the footage on was quite slow, there are only a couple of computers in the school that have the software we need on them, sometimes the computers in a different room were available and these were quicker so we would use this to edit the footage. The computer was the main element for planning and researching the whole product, we used it for editing, research on the internet and using different software to plan the products. We learnt how to use different softwares and new ways to record our work.

Adobe Premiere Elements: This is the software we used to edit the whole project. Using this software we can create many different effects. From using this software we found that sometimes when trying to edit the footage it can jump where the computers are slow, this can be quite frustrating and slows us down when trying to edit. We found that different transistions can create different effects depending on the style of your teaser, a horror teaser looks good using the dip to black transition where a chick flick may not. I also learnt quick ways of editing and cutting scenes. Another thing we learnt was that you can manipulate sound more and add many different effects and layer them to create a unique sound effect.
YouTube: We used YouTube to upload our videos we created to get feedback from other people and easily access the videos to add them to our blogs, from using YouTube we learnt that you can compare your teaser to other peoples teaser much easier and get more ideas about other peoples products. We also learnt that uploading videos can be a lengthy process. Uploading our audience feedback took abou an hour to upload.

Blogger: We used blogger to write up all our research, planning and evaluation for our product. From using blogger I learnt that the interent can not always be reliable, when I tried to access blogger from school sometimes it would not work and I would struggle to get work completed. I also learnt that it is an effective way of doing work as i could easily access it at home and continue work from where I left off. The last thing I learnt was that blogger can be quite slow at showing images I have posted, depending on what computers I used at school.

Slide Share: We used slideshare to create power points to present our ideas and drawings for what we would like to film.

Freeplaymusic: We used freeplaymusic to search for music and sound effects for our teaser trailer, from using this we found that it is quite hard to find music to fit what you have made, the titles for the music they have is quite misleading.

IMDB: We used the internet movie database to research films that were similar to ours, look at there tag lines and what there posters look like. After using IMDB we learnt how to quickly research films and get inspiration for own ideas.

Pearl and Dean: We used this website to find out who are target audience would be, we learnt how to find out what percentage of males and females and what ages went to see certain films, this was very useful when deciding what percentage of people would see our type of film.

Creating the Poster and Magazine front cover:
Adobe Photoshop: We used Adobe photoshop to manipulate and edit the photos we had taken for our poster and magazine front cover. I learnt how to layer and edit the contrast of photos to create an effect that made one section lighter and one section darker, this created a creepy effect. I also learnt how to crop and add text to the images to make it look like a poster and magazine front cover.

Adobe Illustrator: We used this software to lay out the images we created on photoshop, using this software I learnt how to publish a product we created to put on blogger and present it in my work.

No comments:
Post a Comment